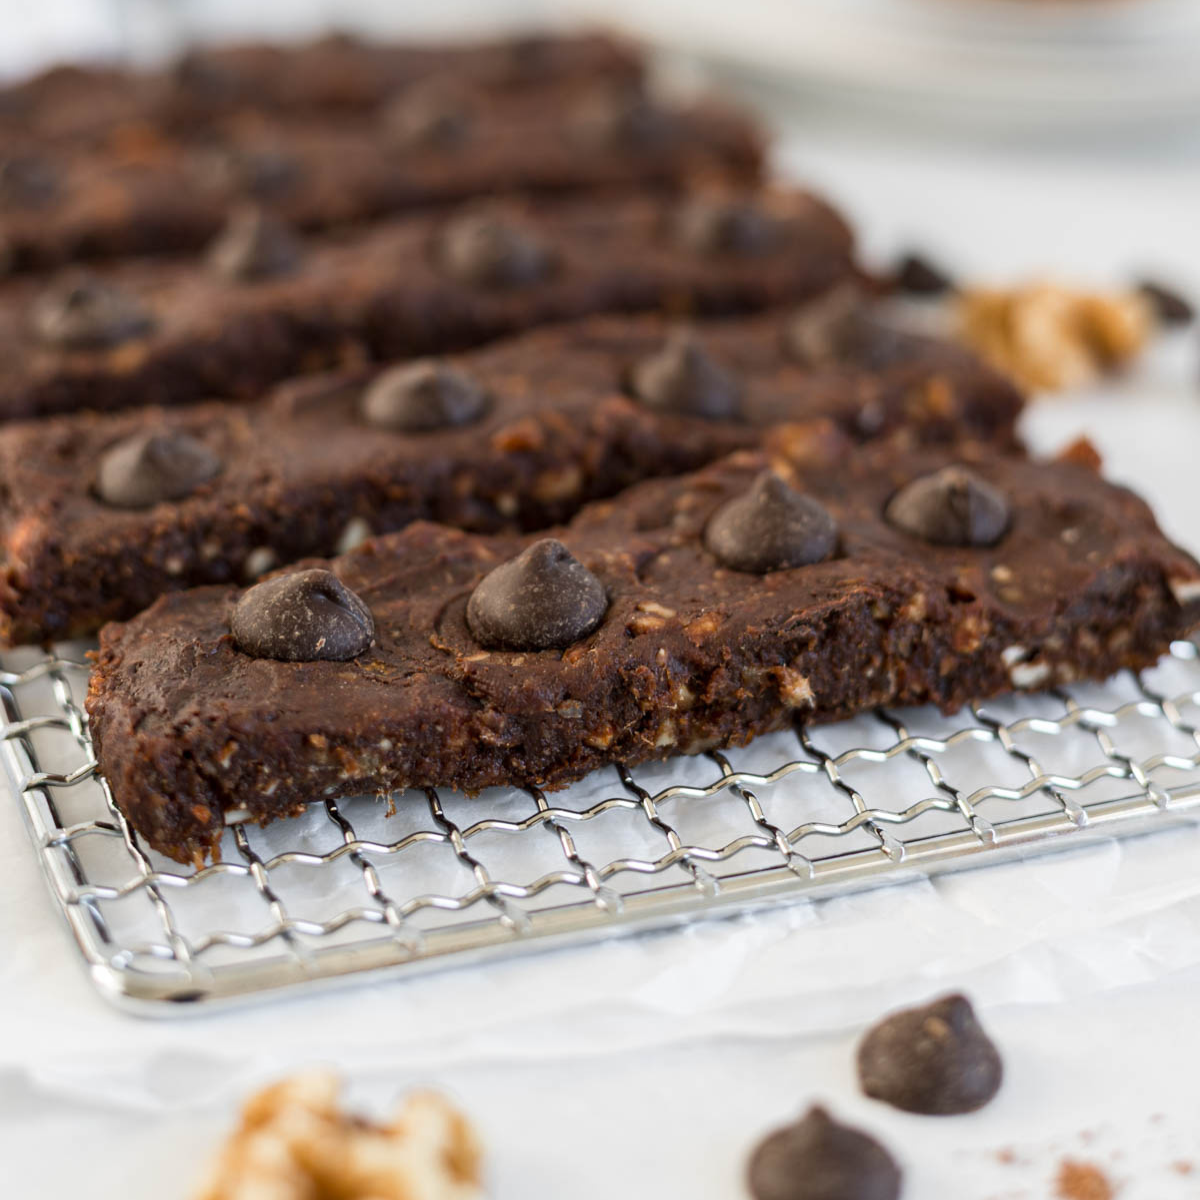
No-Bake Chocolate Chip Brownie Bars
This website uses affiliate links which may earn commission for purchases made at no additional cost to you.
If you’re looking for a quick, satisfying, and absolutely delicious healthy snack, these No Bake Chocolate Chip Brownie Bars are it. With only 6 simple ingredients, they’re naturally sweetened, full of healthy fats, and perfect for meal prep, kid or adult snacks, or taking with you on the road.
My kids devour these bars when I make them…and so do I! They are soooo delicious!! These bars were inspired by the Larabar Chocolate Chip Brownie flavor!
As a FASTer Way nutrition and fitness coach, I’m always looking for nutrient-dense snack options that taste amazing and are simple to prep. These Chocolate Chip Brownie Bars are a copycat homemade Larabar, made with real-food ingredients and no refined sugar — the kind of snack you can feel good about sharing with your kids and packing in your own bag, whether you’re traveling, going to the pool or the beach, packing your kids’ lunchboxes, or going into the office.
If you’re working toward better energy and healthy habits for your whole family, this is the kind of recipe I love sharing with my FASTer Way clients. It’s all about simple, sustainable nourishment — and snacks like these homemade Larabars help make healthy living feel so doable and enjoyable.
My family also loves these Date Energy Bars and No-Bake Chocolate Almond Butter Balls as easy, travel-friendly snacks!
Recipe Ingredients
You’ll need the following ingredients to make these No-Bake Bars:
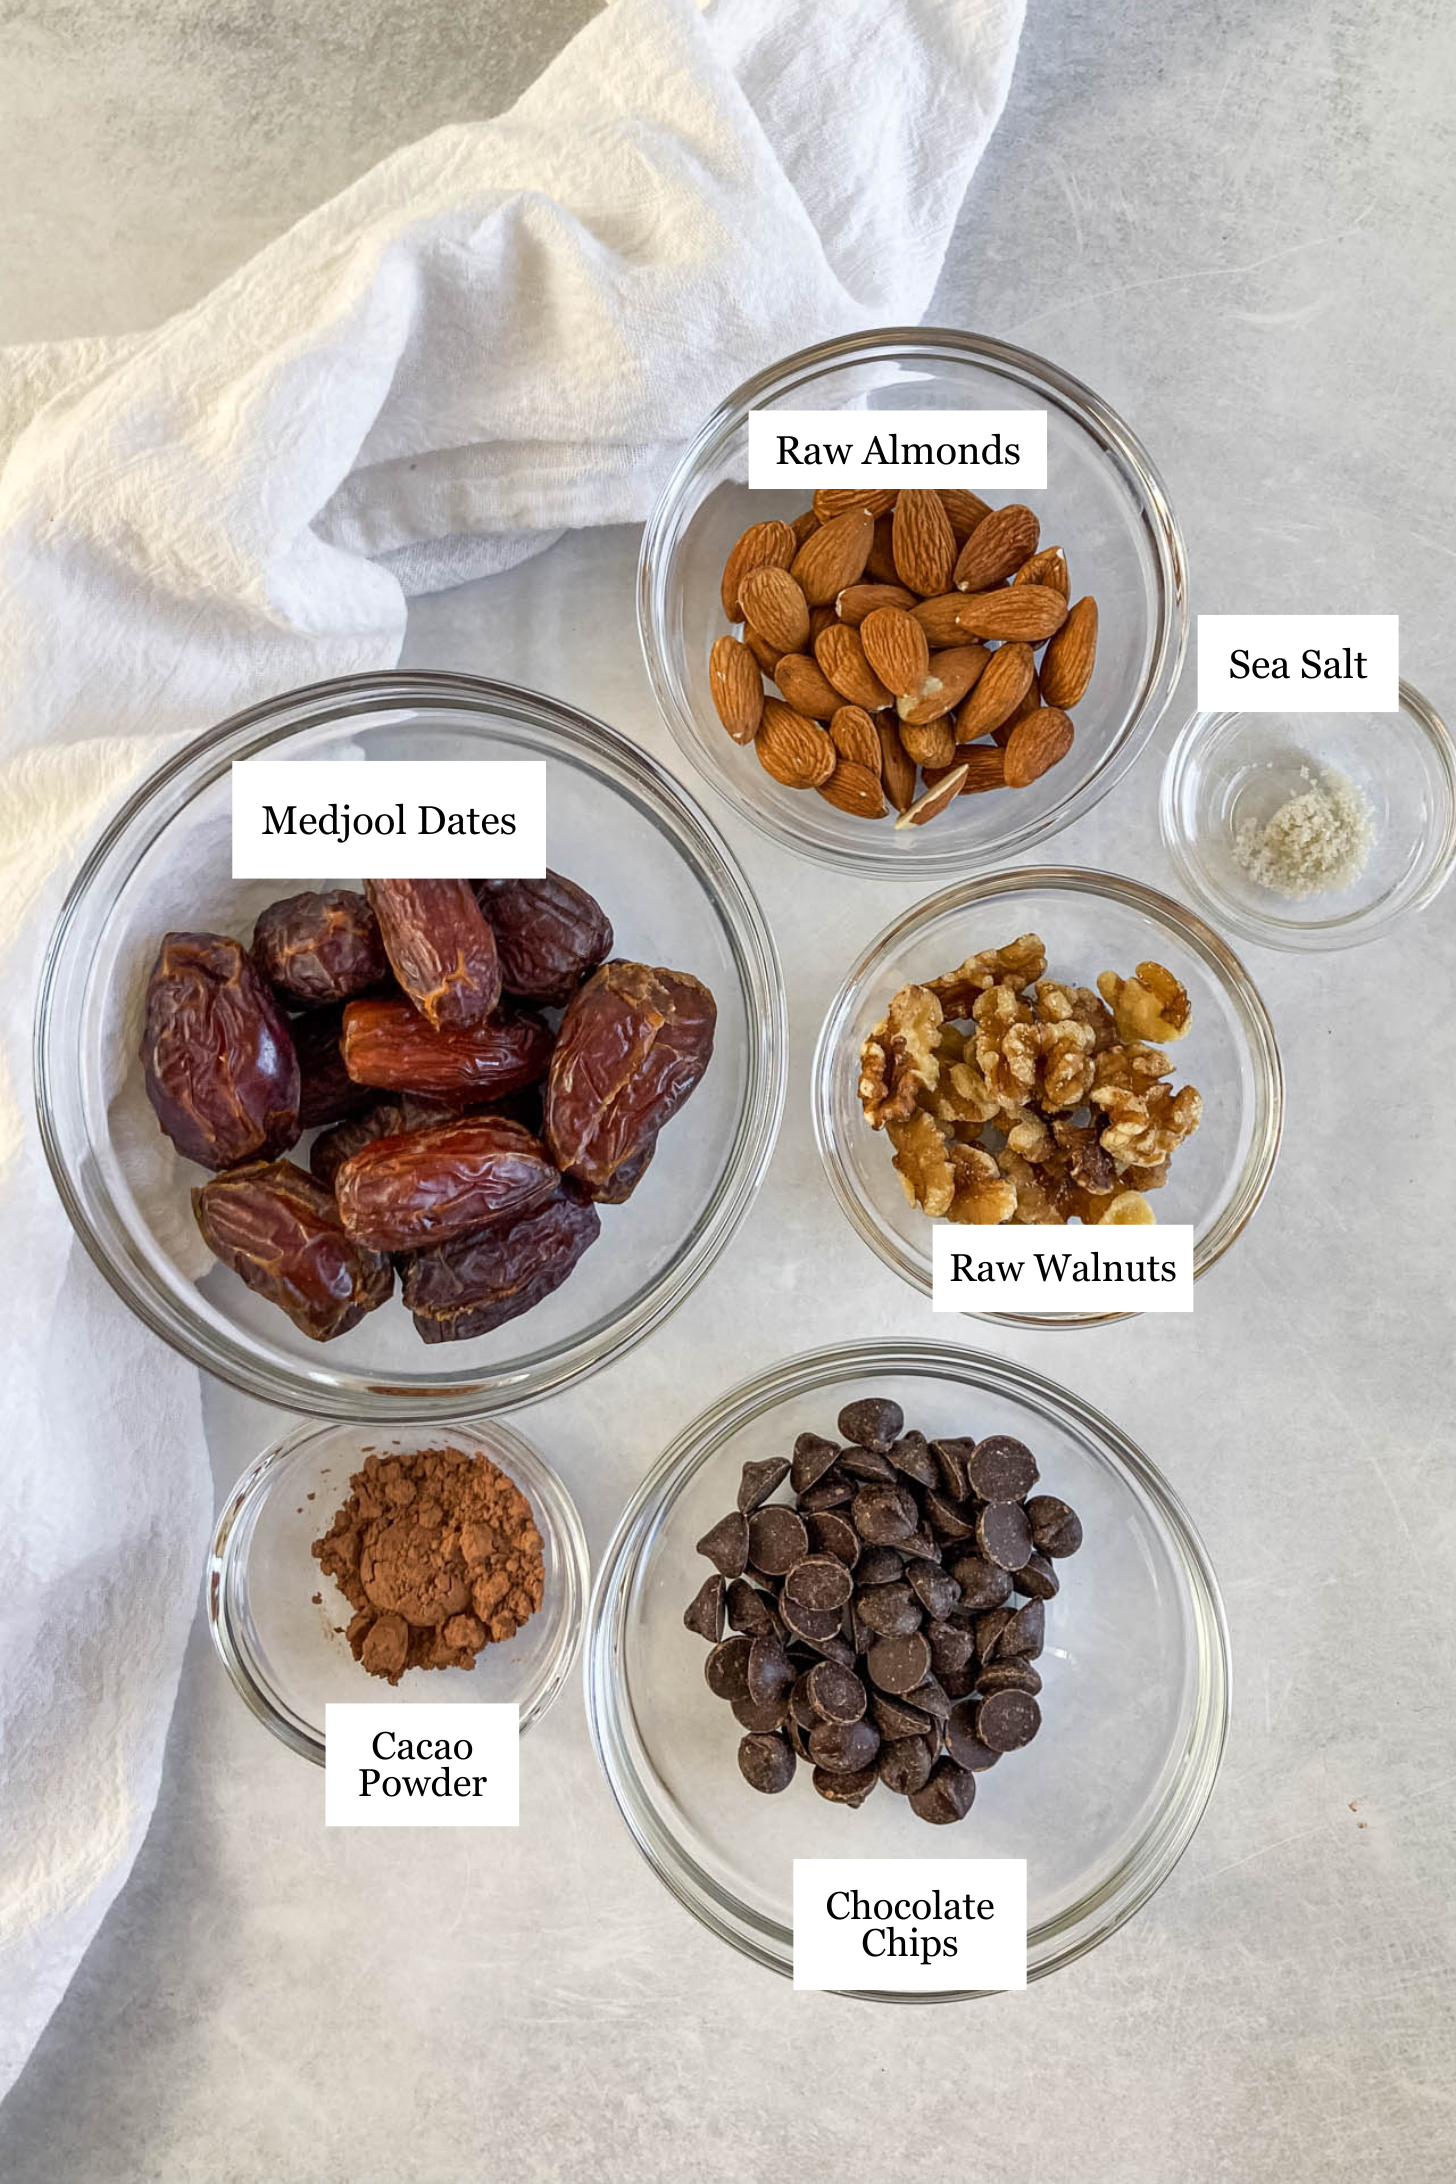
Ingredient Notes
- Chocolate Chips: I love using Hu Chocolate, Enjoy Life, or Lily’s Chocolate for gluten-free, dairy-free, and low sugar options. I love adding some chocolate chips on top of each bar!
- Cacao Powder: Be sure it’s unsweetened. If you can’t find cacao powder, using cocoa powder would be fine in a pinch. Just be sure it’s unsweetened.
Additions & Substitutions
- Nuts: Swap the walnuts for more almonds or even cashews. Likewise, you can swap out the almonds for more walnuts or cashews. Feel free to experiment with the nuts of your choice, just know that it will change the flavor profile.
- Chia Seeds: Add some chia seeds for a boost of fiber.
- Unsweetened Shredded Coconut: Stir in some unsweetened shredded coconut for a fun texture and added flavor.
Tools For This Recipe
- Food processor
- 8.5 x 6.5-inch baking dish/glass container or similar
How to Make Chocolate Chip Brownie Bars: Step-by-Step
For the full recipe with the exact ingredients, scroll down to the printable recipe card below!
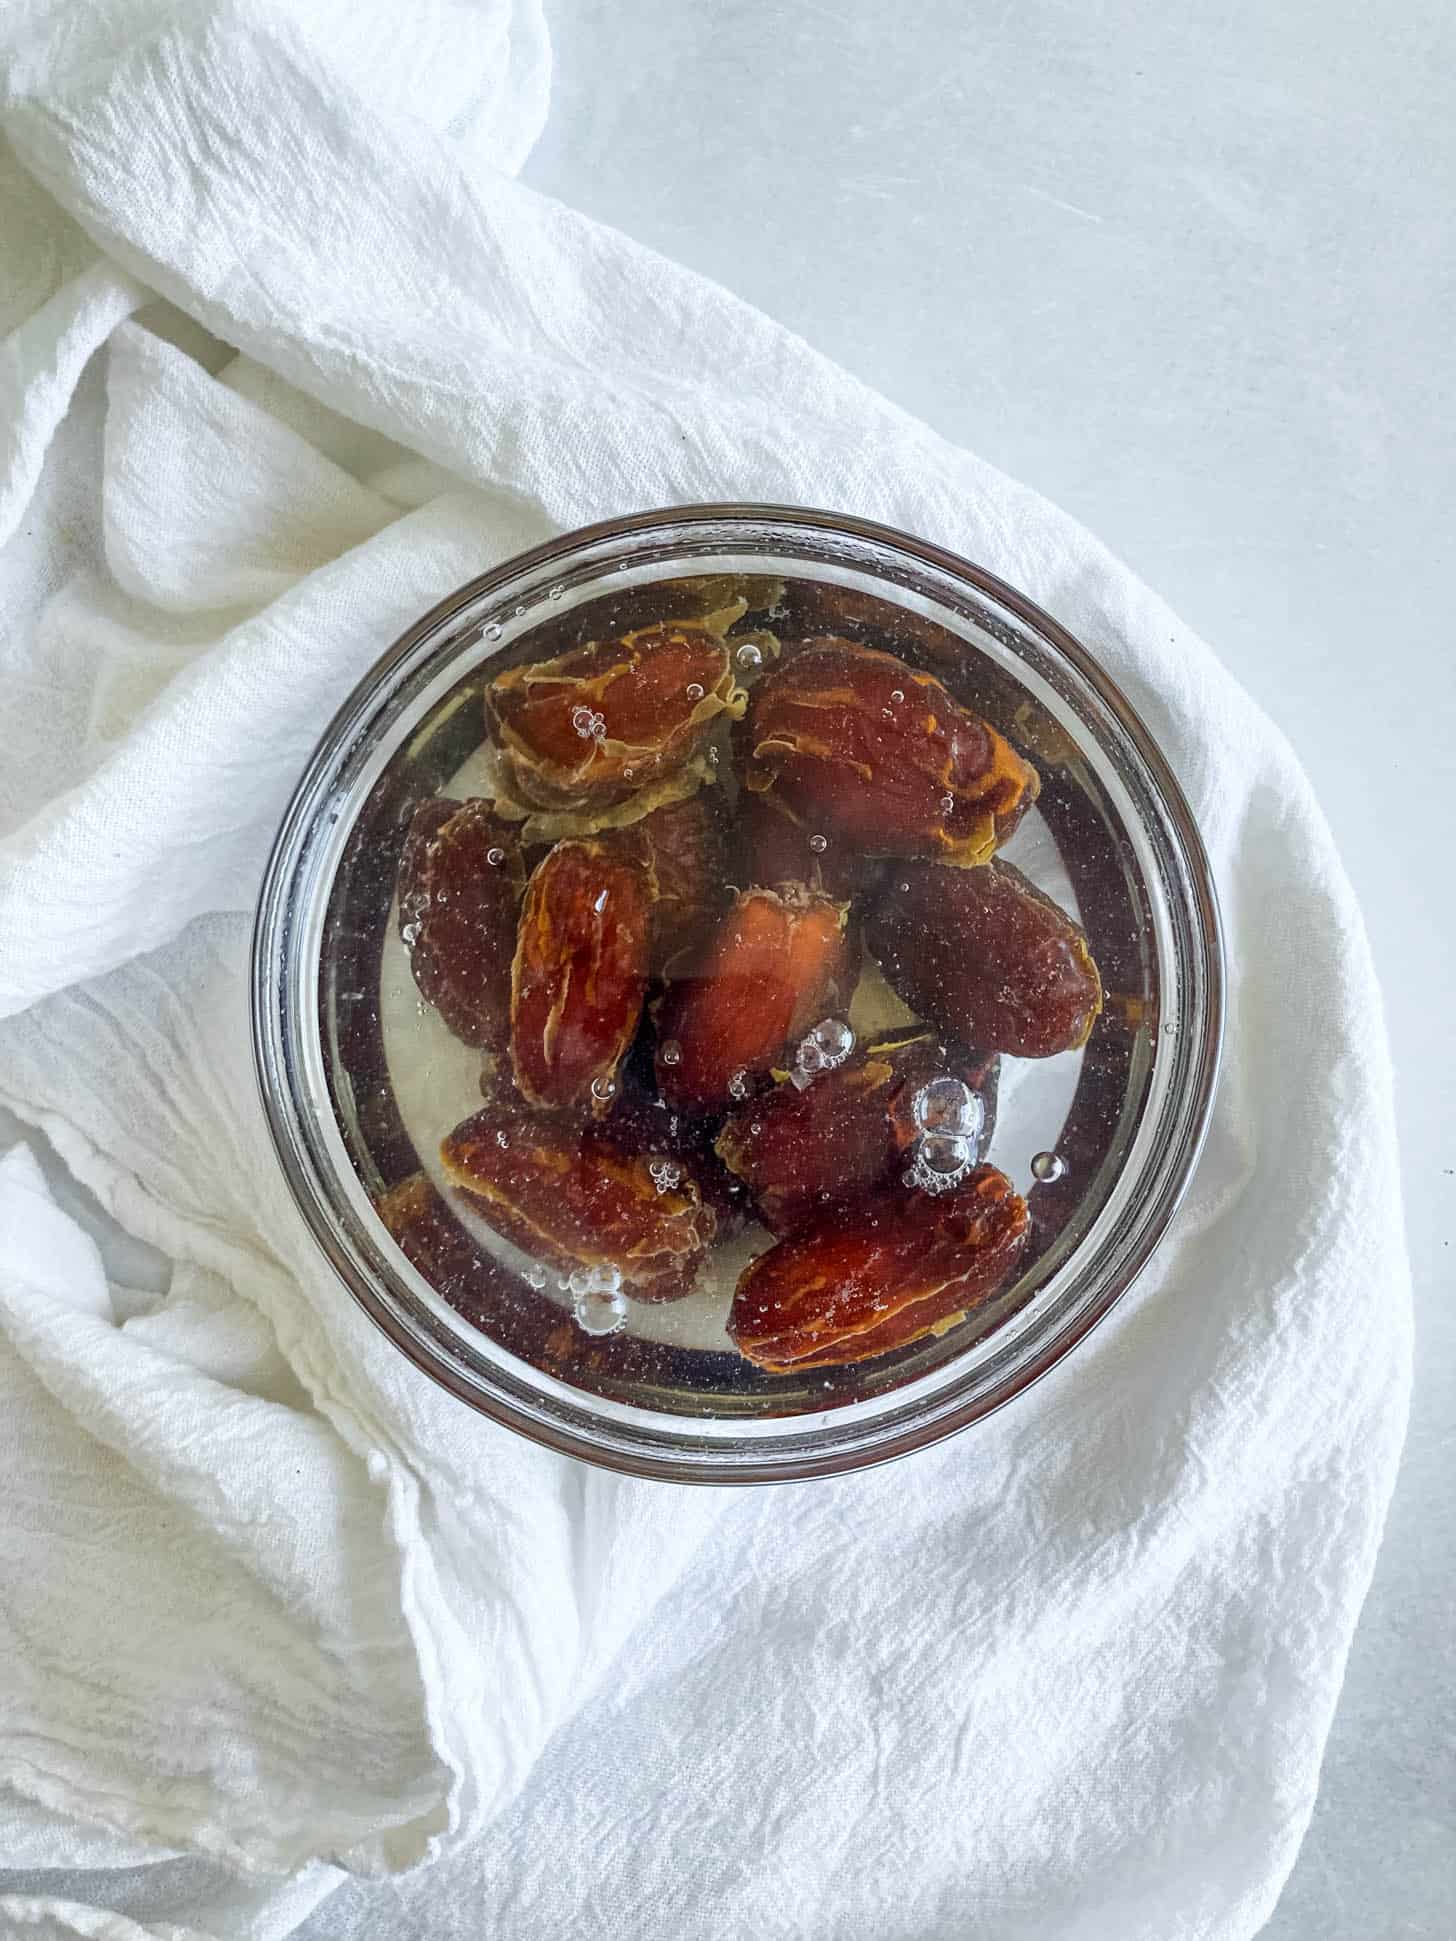
Step 1: If your dates are a bit firm, pour hot water over them and let them sit for one minute to soften. Drain and set aside.
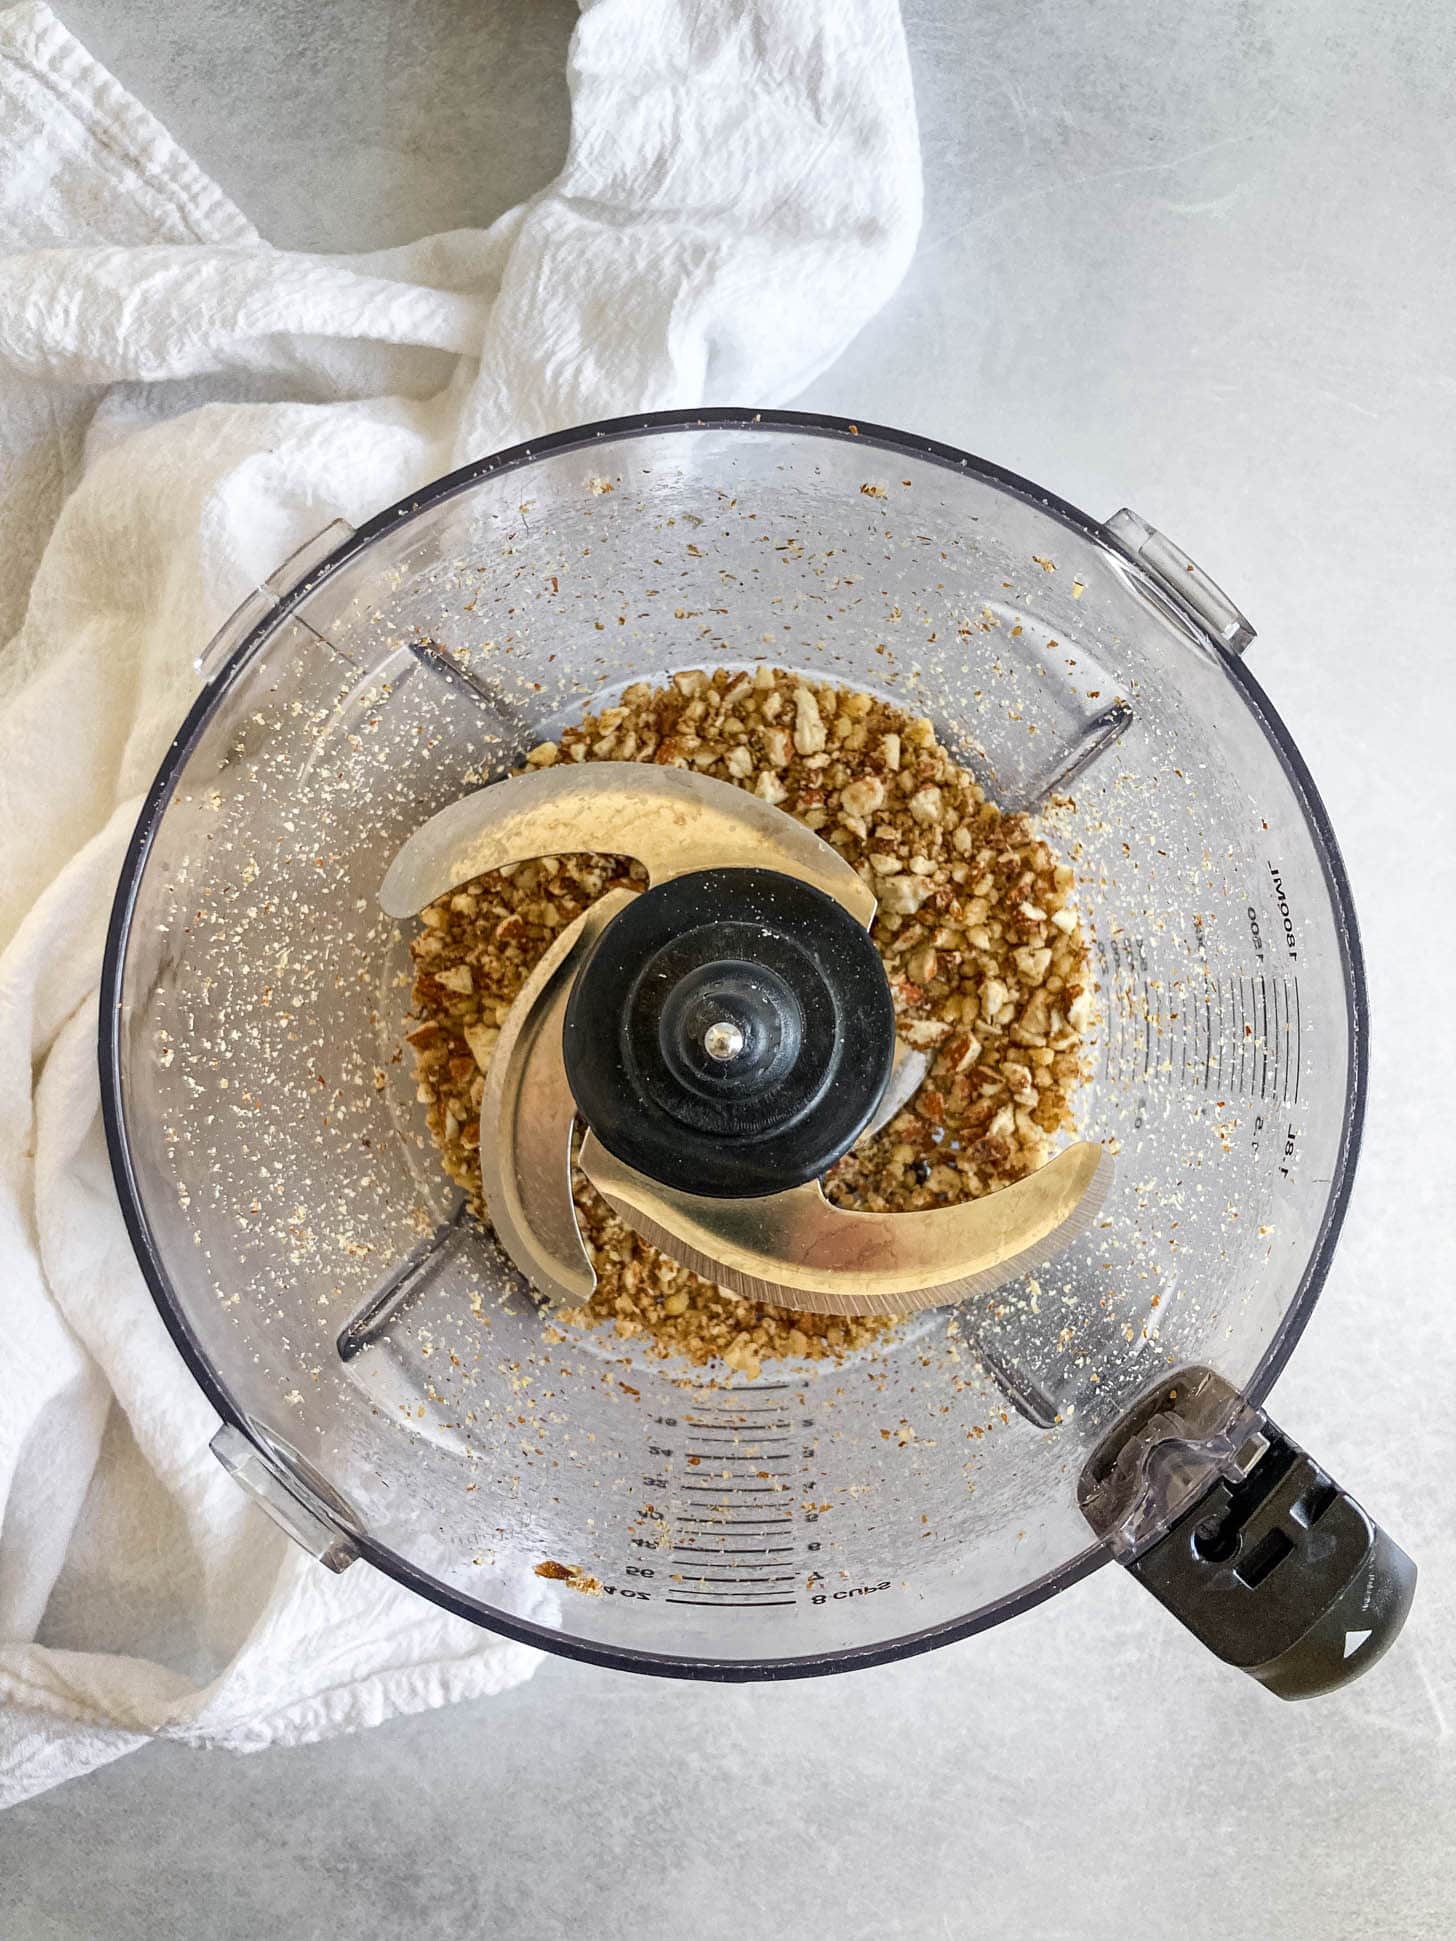
Step 2: Add raw almonds and walnuts to a food processor. Pulse until broken into small pieces.
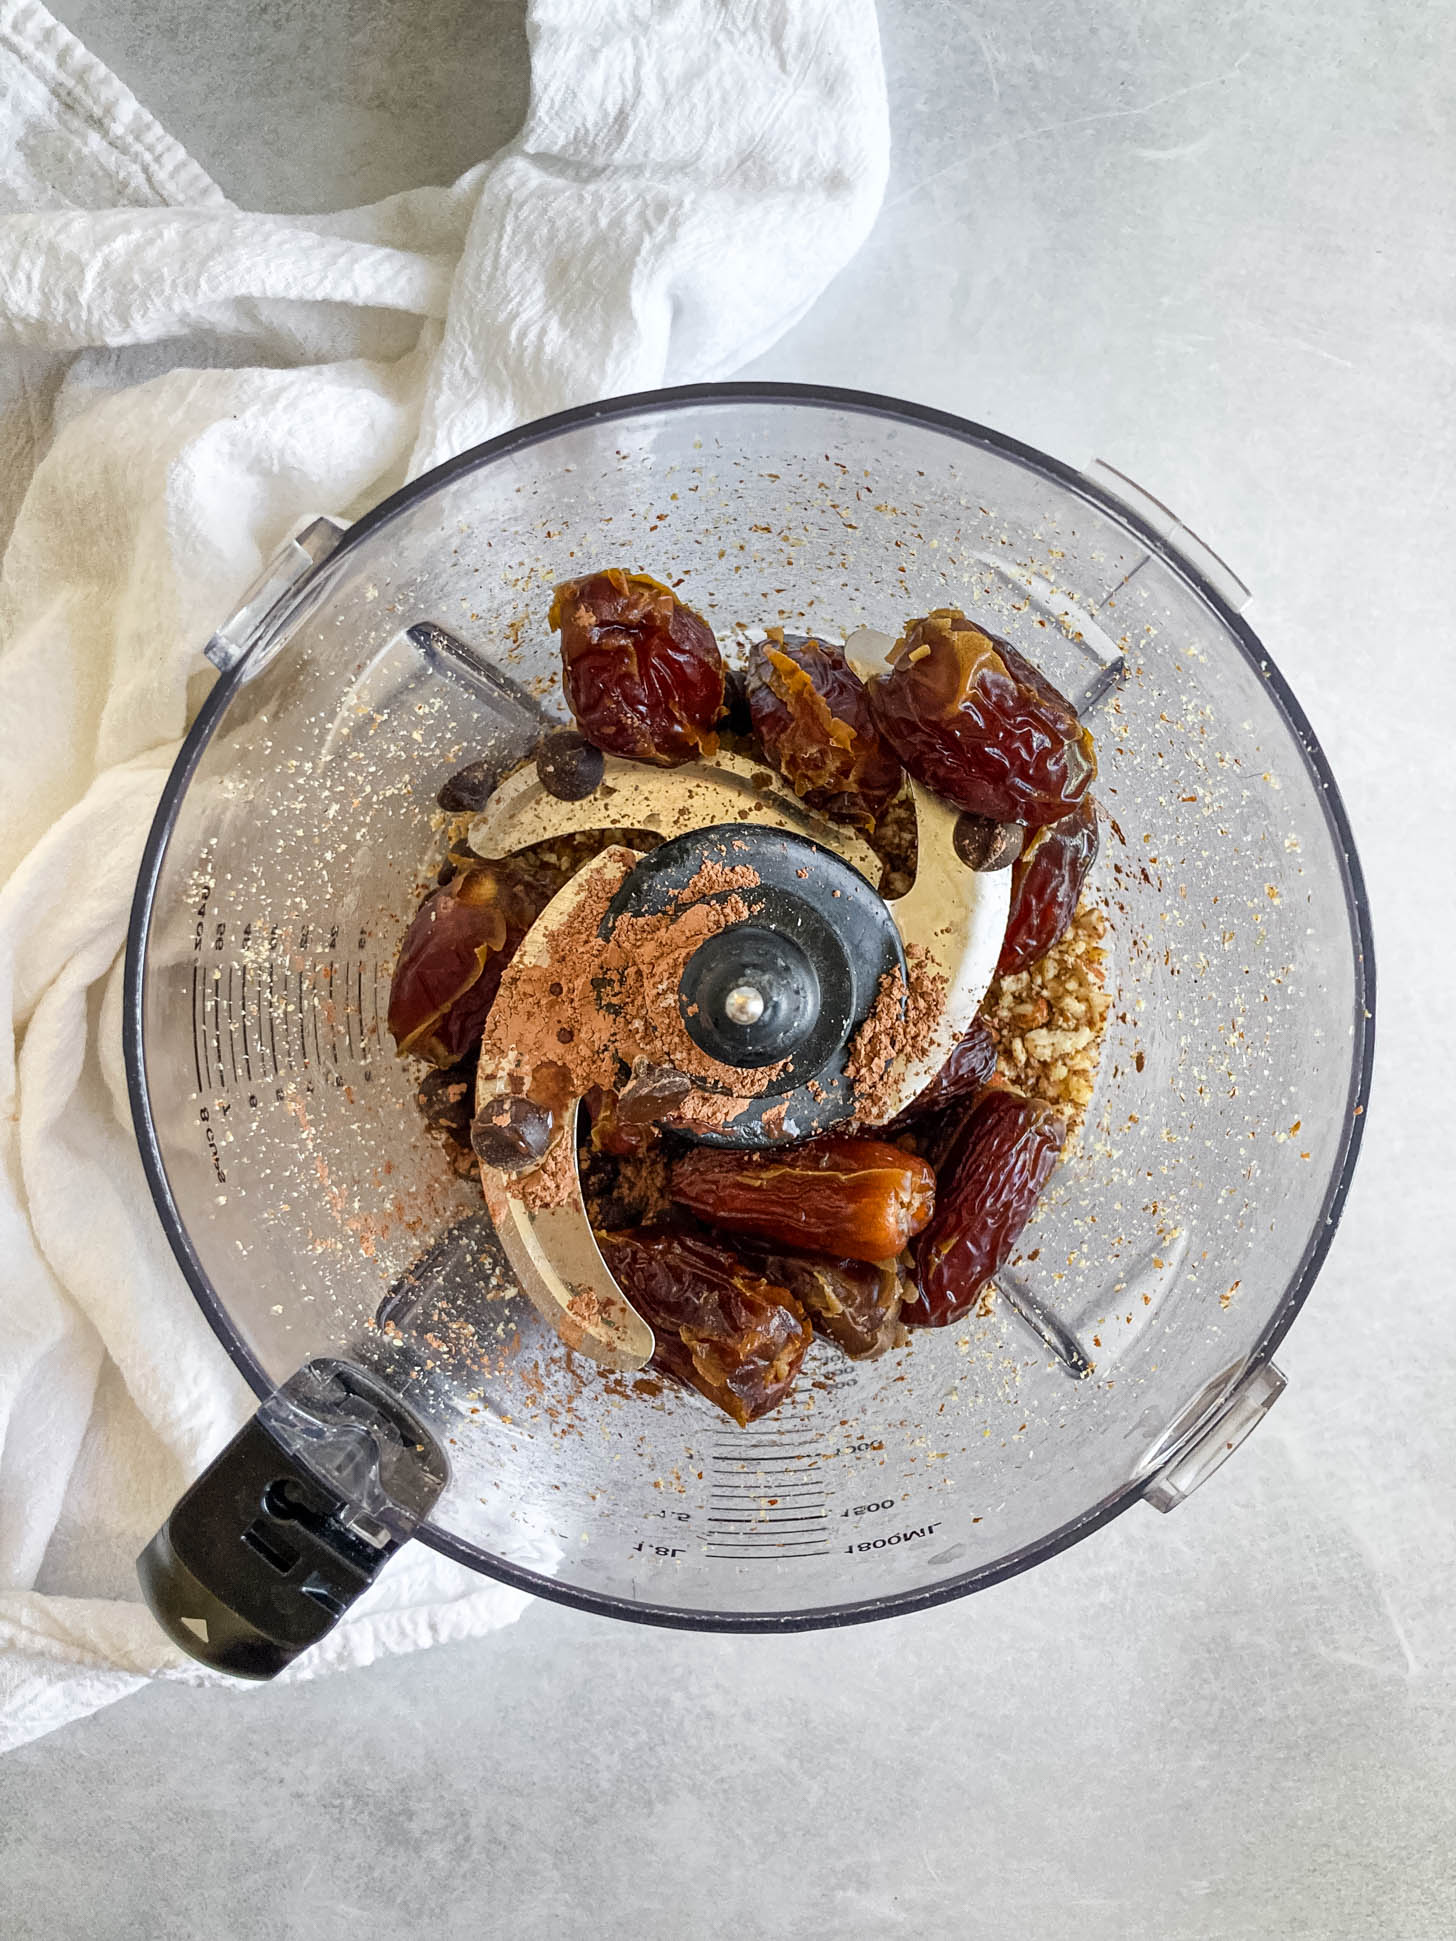
Step 3: Add softened dates, chocolate chips, cacao powder, and sea salt to the food processor.
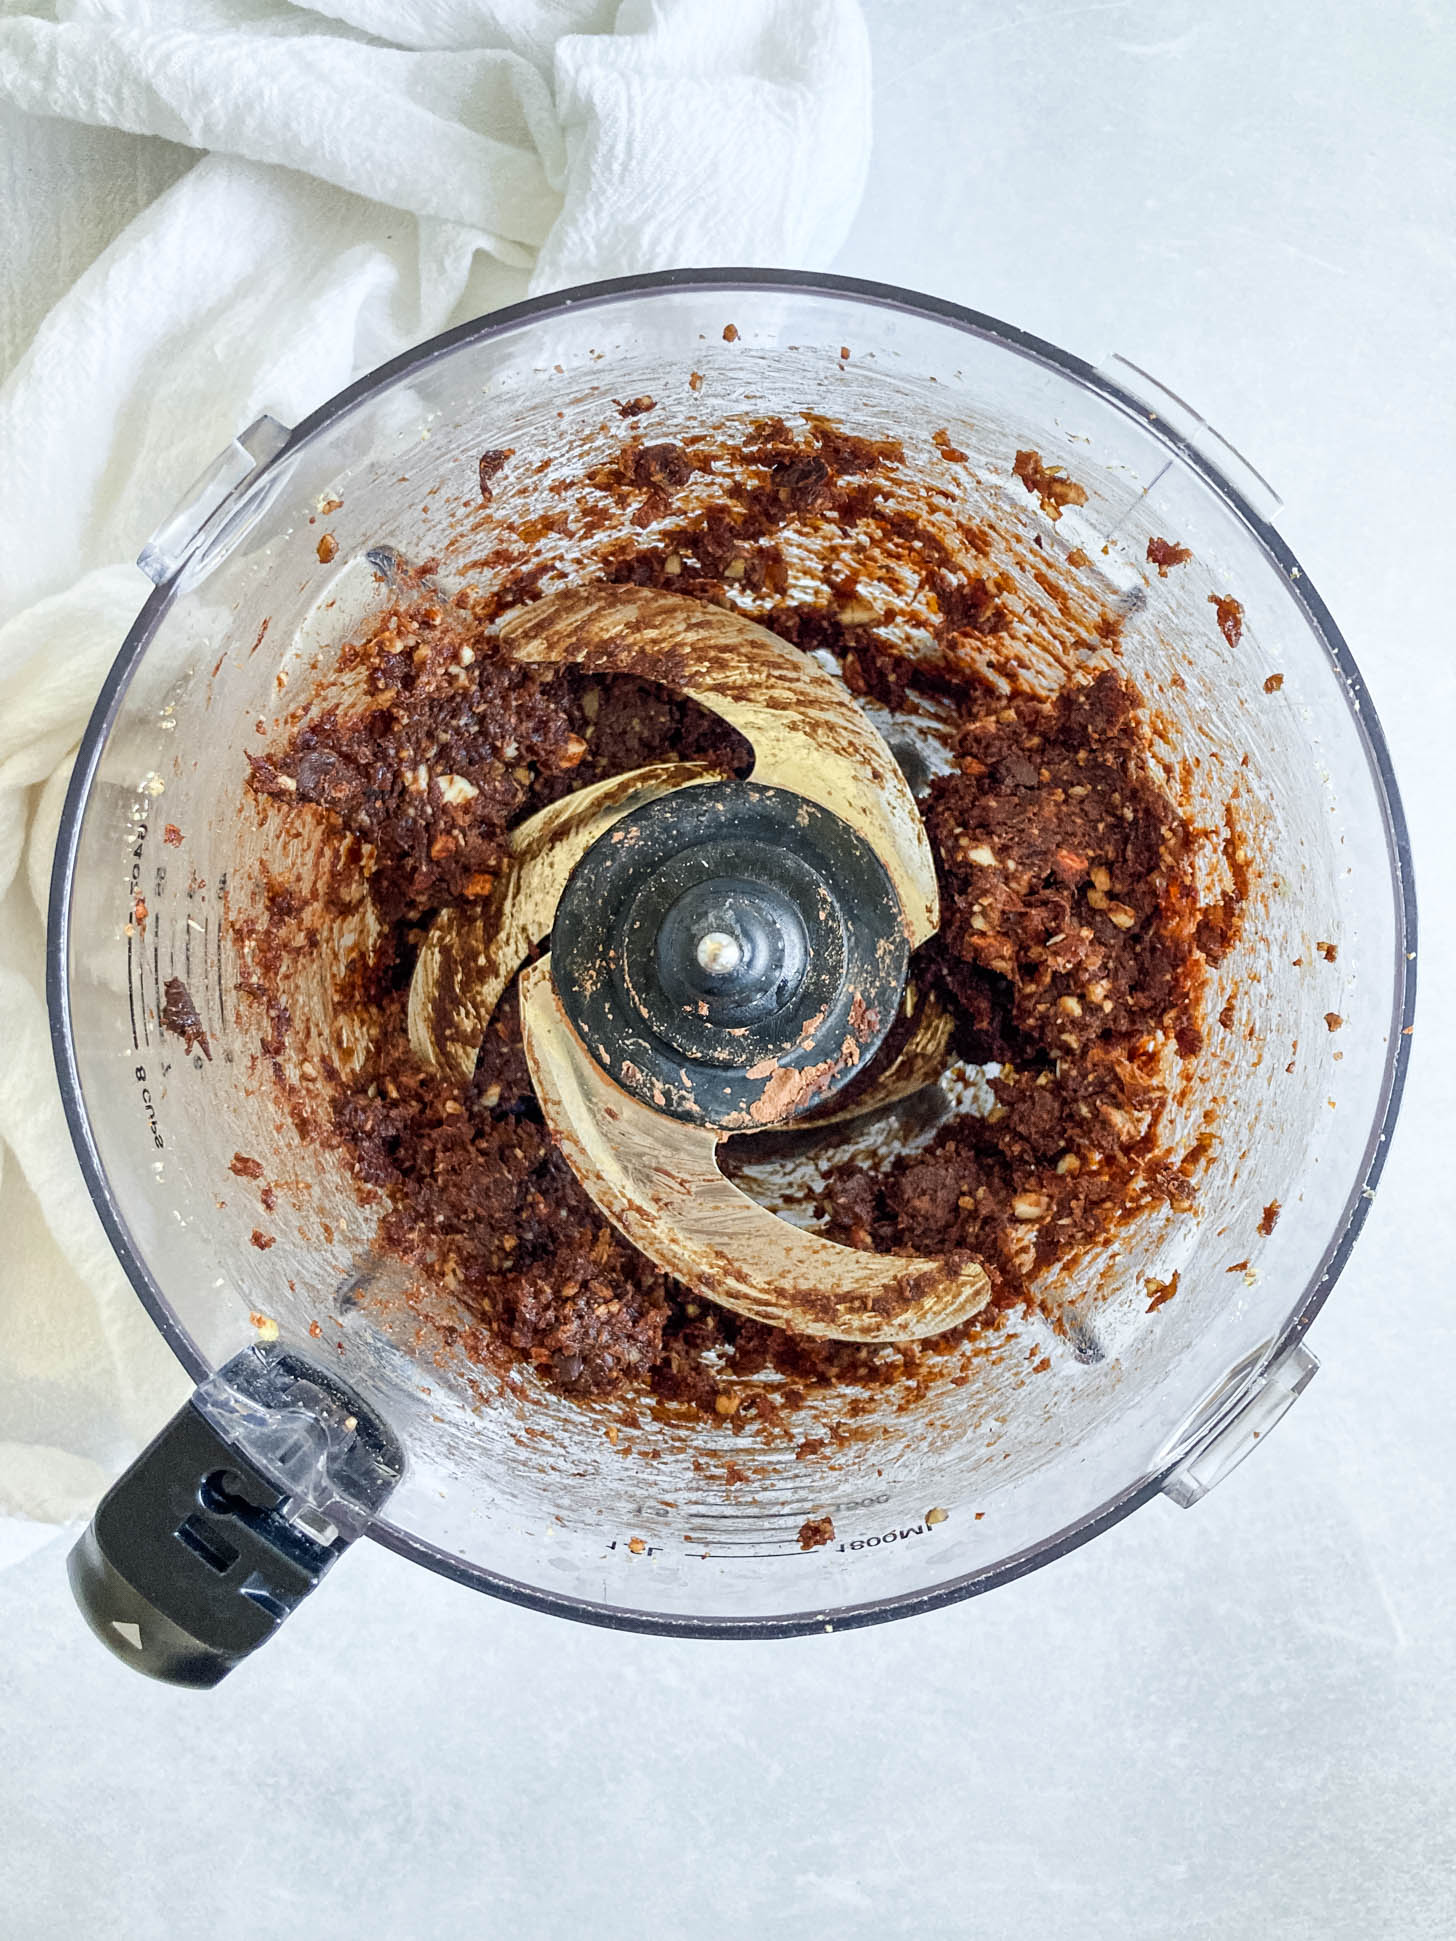
Step 4: Blend until it forms a thick, sticky dough. Stop and scrape down the sides if needed.
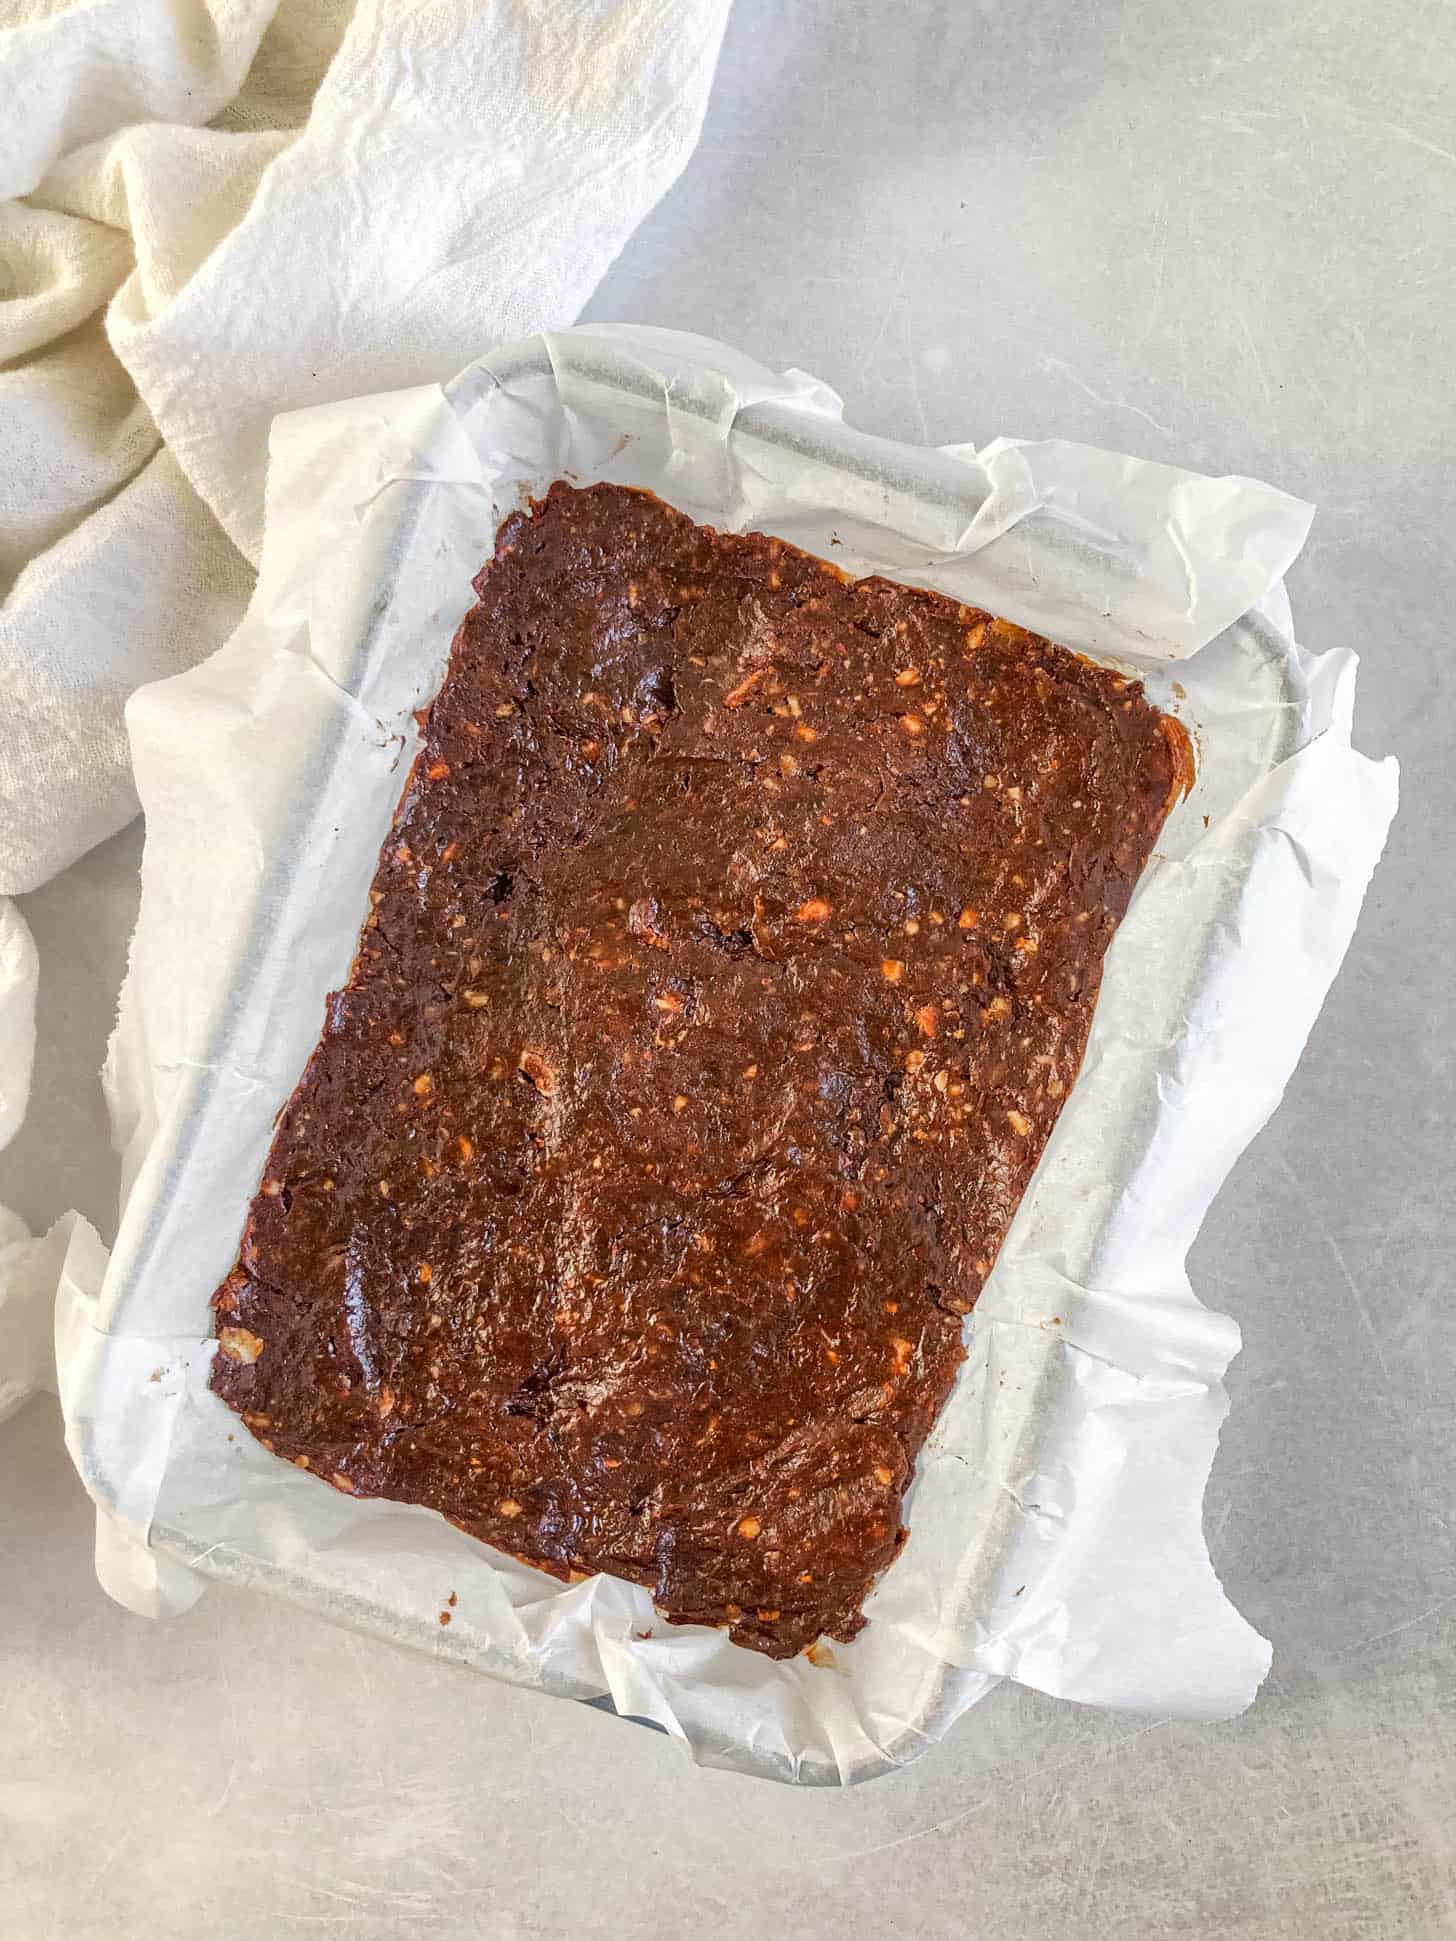
Step 5: Line your baking dish with parchment paper (clipping the edges with clothespins can help keep the parchment paper steady). Spread the mixture evenly in the baking dish using a spatula. Refrigerate the bars for at least 10–15 minutes to firm up. Then slice into 6 bars. Sprinkle more chocolate chips and/or flaky sea salt on top if you’d like!
Storage
- Store your Chocolate Chip Brownie Bars in an airtight glass container in the fridge for up to 7 days.

Frequently Asked Questions
Yes! As long as you choose gluten-free chocolate chips, the entire recipe is naturally gluten-free.
Yes, as long as you are sure to use dairy-free chocolate chips!
You can, however, Medjool dates are preferred because they’re softer and stickier, which helps the bars hold together. I find that Mejdool dates are richer in flavor as well.

In a Lunch Rut?
Grab your FREE 10-Day Lunchbox Recipe Meal Plan! Great for adults and kids!
More Snack Recipes You’ll Love!


Did you try this recipe?
Let me know how you liked it by leaving a comment and rating below! Or tag me on Instagram and share what you made!
Want more simple, family-friendly recipes that fit your healthy lifestyle and help you feel like the Supermom that you really are? Be sure to join my email newsletter for weekly inspiration — and if you’re ready to feel better in your body and set your family up for long-term health, come check out my next FASTer Way round!

No-Bake Chocolate Chip Brownie Bars
Ingredients
- 12 Medjool dates
- 1/4 cup raw almonds
- 1/4 cup raw walnuts
- 1/4 cup chocolate chips
- 2 teaspoons cacao powder
- 1/4 teaspoon sea salt
Instructions
- If your dates are a bit firm, pour hot water over them and let them sit for one minute to soften. Drain and set aside.
- Add raw almonds and walnuts to a food processor. Pulse until broken into small pieces.
- Add softened dates, chocolate chips, cacao powder, and sea salt to the food processor.
- Blend until it forms a thick, sticky dough. Stop and scrape down the sides if needed.
- Line a 8.5 x 6.5″ baking dish or glass container with parchment paper (clipping the edges with clothespins can help keep the parchment paper steady). Spread the mixture evenly in the baking dish using a spatula, pushing down on it so it’s compact.
- Refrigerate the bars for at least 10–15 minutes to firm up. Slice into 6 bars. Sprinkle more chocolate chips and/or flaky sea salt on top if you’d like!
Delicious and easy to make. Hit my sweet tooth just right!
Hi Lindsey! Yay! I’m so happy these bars satisfied your sweet tooth and that you enjoyed them. 🙂 Thank you so much for taking the time to leave a review!